Send mobile notifications from Power Apps app📲
You can send a push notification from one app to another or to the same app. In canvas apps, you can send notifications by using the Power Apps Notification connector.
In this article, the sample app used for notifications is built from the default Case Management app template.
Before you begin, create push notifications for the Power Apps mobile app:
Push notifications are used in Power Apps mobile to engage app users and help them prioritize key tasks. In Power Apps, you can create notifications for Power Apps mobile by using the Power Apps Notification connector. You can send notifications to any app that you create in Power Apps.

Add a push notification to your app if:
- Your users need to know information immediately.
- Your users must complete important tasks by using your app, in a preloaded context.
- You want to engage your users on a specific interval, or you need users to enter the app in a specific context.
Before you can create push notification you need to have access to an app and have the row ID if you're creating a notification for a form.
Create an app
You need to have Contributor permission for a model-driven app or canvas app. If you don't have an app, you can create one. For information, see:
Create a notification from a flow
When you trigger a push notification from a flow, you can send the notification to only one user or security group at a time.
1. Go to Power Automate and select Create.
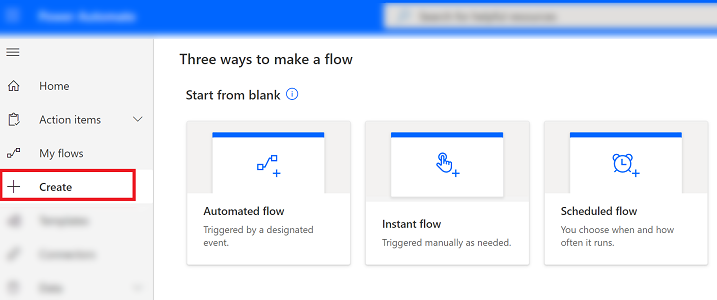
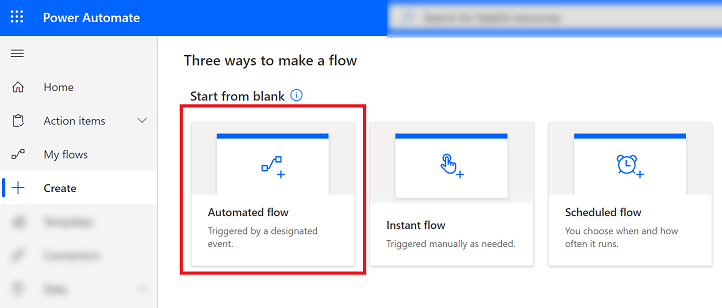
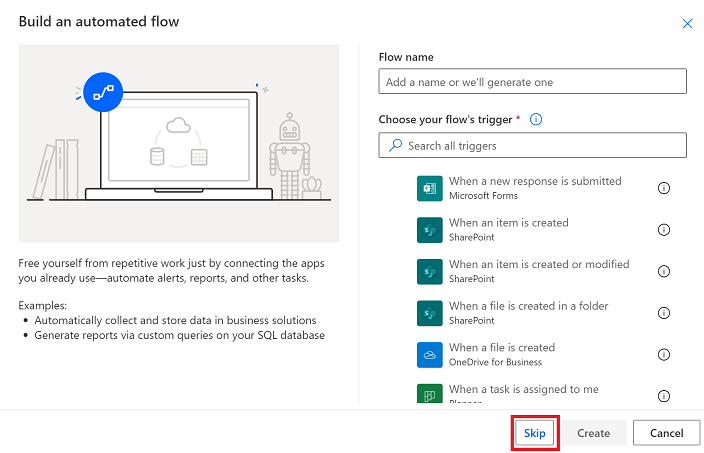
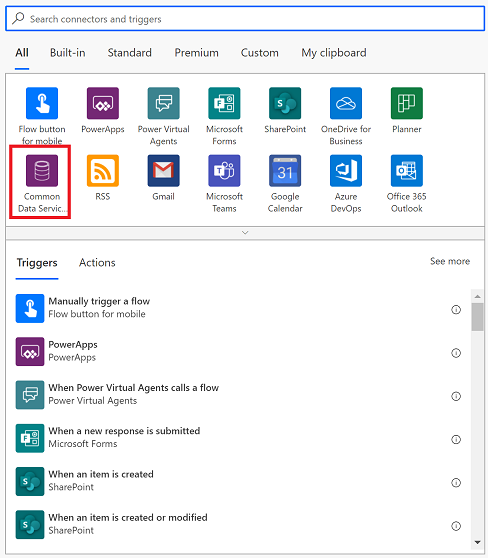
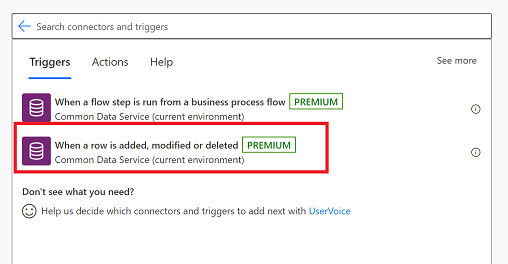
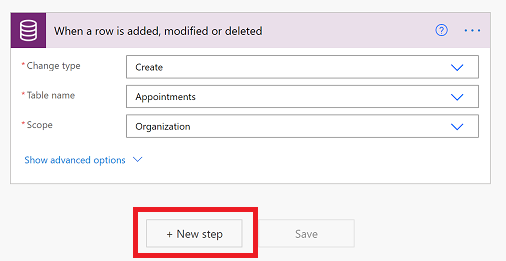
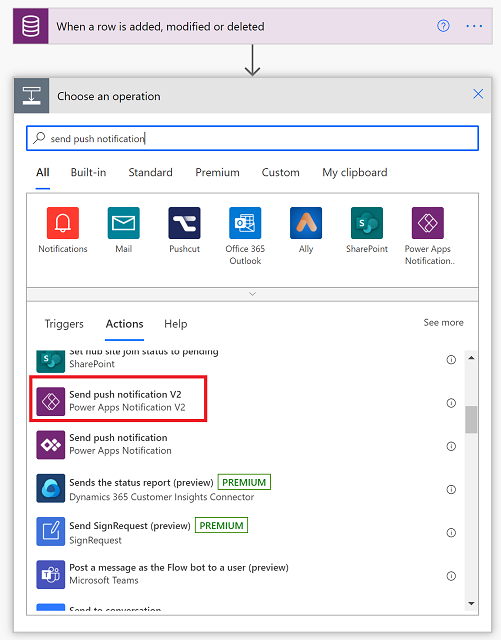
7. In the Choose an action search box, enter send push notification. In the list of Actions choose Send push notification V2.
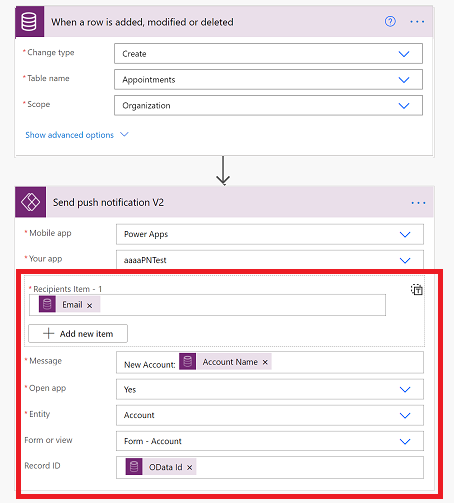
- Mobile app: Select Power Apps.
- Your app: Select the app that you want to set up the notification for. Model-driven apps and canvas apps have different parameters. The next step will depend on the type of app you select here.
For a model-driven app, enter this information:
- Recipient Items-1: Select how the flow is triggered.
- Message: Enter the notification message.
- Open app: Select whether to open the model-driven app or not when the user selects the notification.
- Table: Select which table the notification is for.
- Form or view: Select if the notification is for a form or view.
- Row ID: If the notification is for a form, then enter the row ID.
For a canvas app, enter this information:
- Recipient Items-1: Select how the flow is triggered.
- Message: Enter the notification message.
- Open app: Select whether to open the canvas app or not when the user selects the notification.
- Parameters: Key-value parameters to pass with the notification. Your push notification can pass specific parameters to the app. These can be further processed in the app to open a specific page and load a specific state.
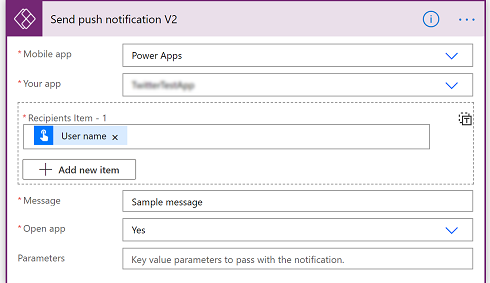
11. Select Flow checker to check for error or warnings.
12. Test the flow by selecting Test and follow the prompts.
Perform an action when a user taps the notification
Pass parameters
For canvas apps, you can pass key-value pairs using the Parameters field as JSON. For example, if you wanted to pass the CaseID, you would put the following as Parameters: { "CaseID": 42 }. You can also use dynamic values from earlier steps as shown below.

Read parameters
To read the passed parameters, use Param("ParameterName"). For example, to read the CaseID value, use Param("CaseID"). To quickly identify this parameter, add a Label control to your app. Set the Text property of that control to Param("CaseID"). If the user opens the app from the All apps list, the value is empty. If the user opens the app from another location on the device, the value is populated with the CaseID value.
Set the start page
You can set your app to open, for example, the Case details page as soon as the app opens:
Add a Timer control, and set its OnTimerEnd property to this formula:
Navigate(EditCase, ScreenTransition.None)(optional) Hide the Timer control by setting its Visible property to false.
Set the OnVisible property of the screen to Timer.Start().
It's a good idea to create a unique first page in the app for the notification:
- Create an empty page that your app doesn't already open, add a Text Input control, and set its timer.Duration value.
- When you create the app, set the timer to a non-zero value. When you're ready to publish the app, set the value to 0 to immediately trigger the timer.
Considerations
- You can send a push notification from one app to another or to the same app.
- Notifications show the generic Power Apps icon instead of a specific app icon.
- Notifications are not supported in China on Android devices.
- Battery optimization settings on an Android device can interfere with receiving notifications for Power Apps mobile. To receive notifications for Power Apps mobile, turn off battery optimization for the app.
- The example push notifications that are mentioned in this topic are only supported on Power Apps mobile. Other mobile apps such as Dynamics 365 Sales mobile app or Dynamics 365 for phones and tablets do not support these types of notifications.
Now, you can send notification from an app
In Power Apps, go to the app to which you want to send push notifications.
Copy the app ID. More information: Get an app ID
In the left pane, select Data - Connections.
Edit the app. More information: Edit an app
Select View - Data sources.
Select Add data source.
Select New Connection.
Select Power Apps Notification.
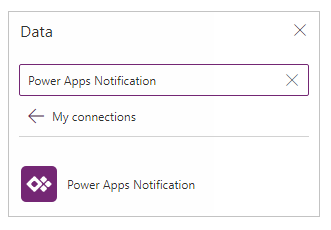
Paste the app ID copied from the previous step.
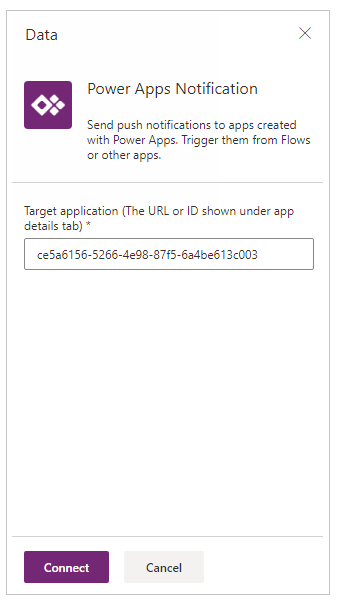
Select Connect.
Add the push notification connection to the trigger app using the similar steps.
In our example, we use the same app as the trigger app. The user who reassigns the case also triggers a push notification to the new case owner.
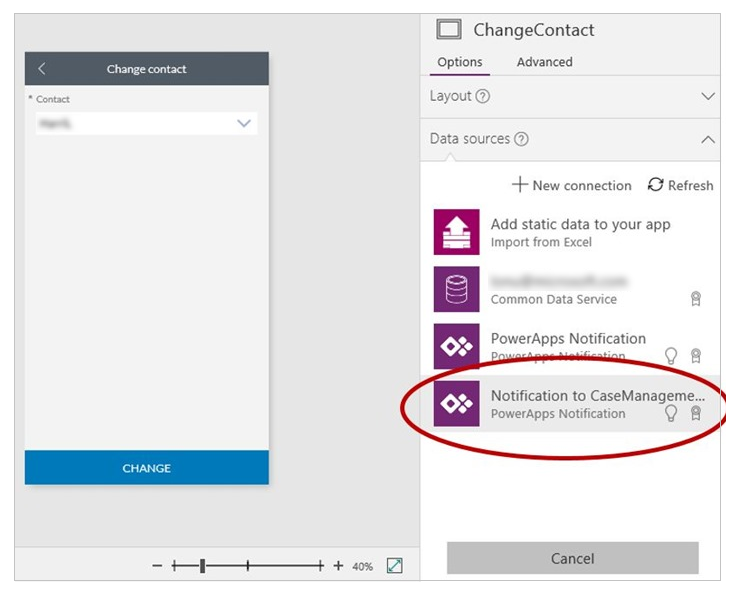
From the push notification connection, call the SendPushNotification method.
In our example, we trigger this notification by using the OnSuccess property in a form.
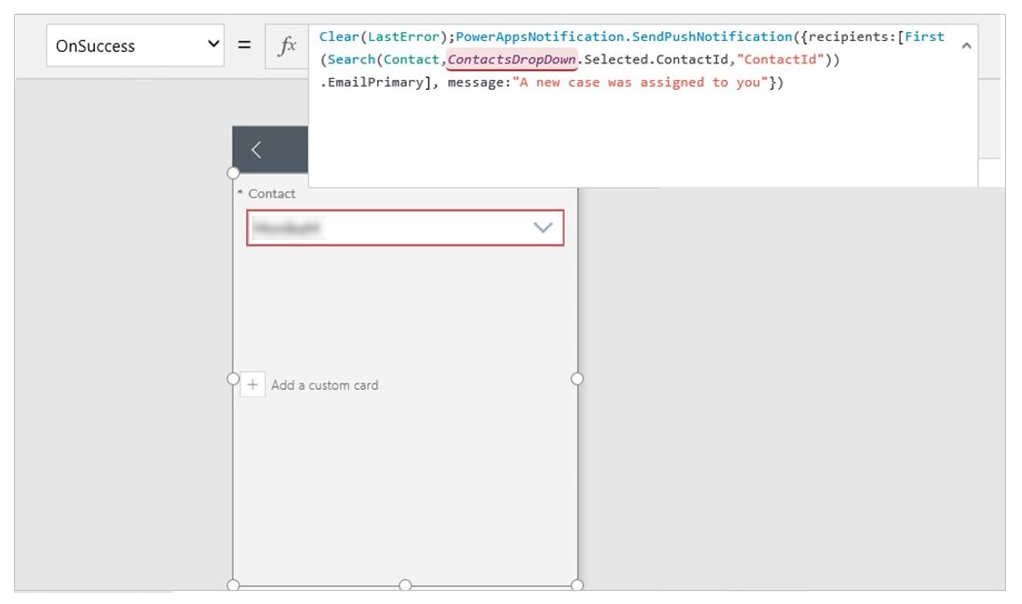
Sample formulas
Send a basic notification.
PowerAppsNotification.SendPushNotification(
	{
		recipients: ["f60ccf6f-7579-4f92-967c-2920473c966b", "72f988bf-86f1-41af-91ab-2d7cd011db47"],
		message: "A new case was assigned to you."
	}
)
Send a notification that opens an app and passes along specific parameters.
PowerAppsNotification.SendPushNotification(
	{
		recipients: ["email1@contoso.com", "email2@contoso.com"],
		message: "message in the notif toast",
		params: Table({key:"notificationKey", value:"The value for notificationKey"}),
		openApp: true
 	}
)


Comments
Post a Comment