Create a cloud flow from a description with AI!
What is Power Automate Describe it to Design it?
It is a new feature that allows you to create a cloud flow by writing a description of what you want to automate in natural language.
If you want to try out Power Automate Flows you can sign up with your Microsoft Account and try them here: Power Automate | Microsoft Power Platform
Create a flow from a description example:
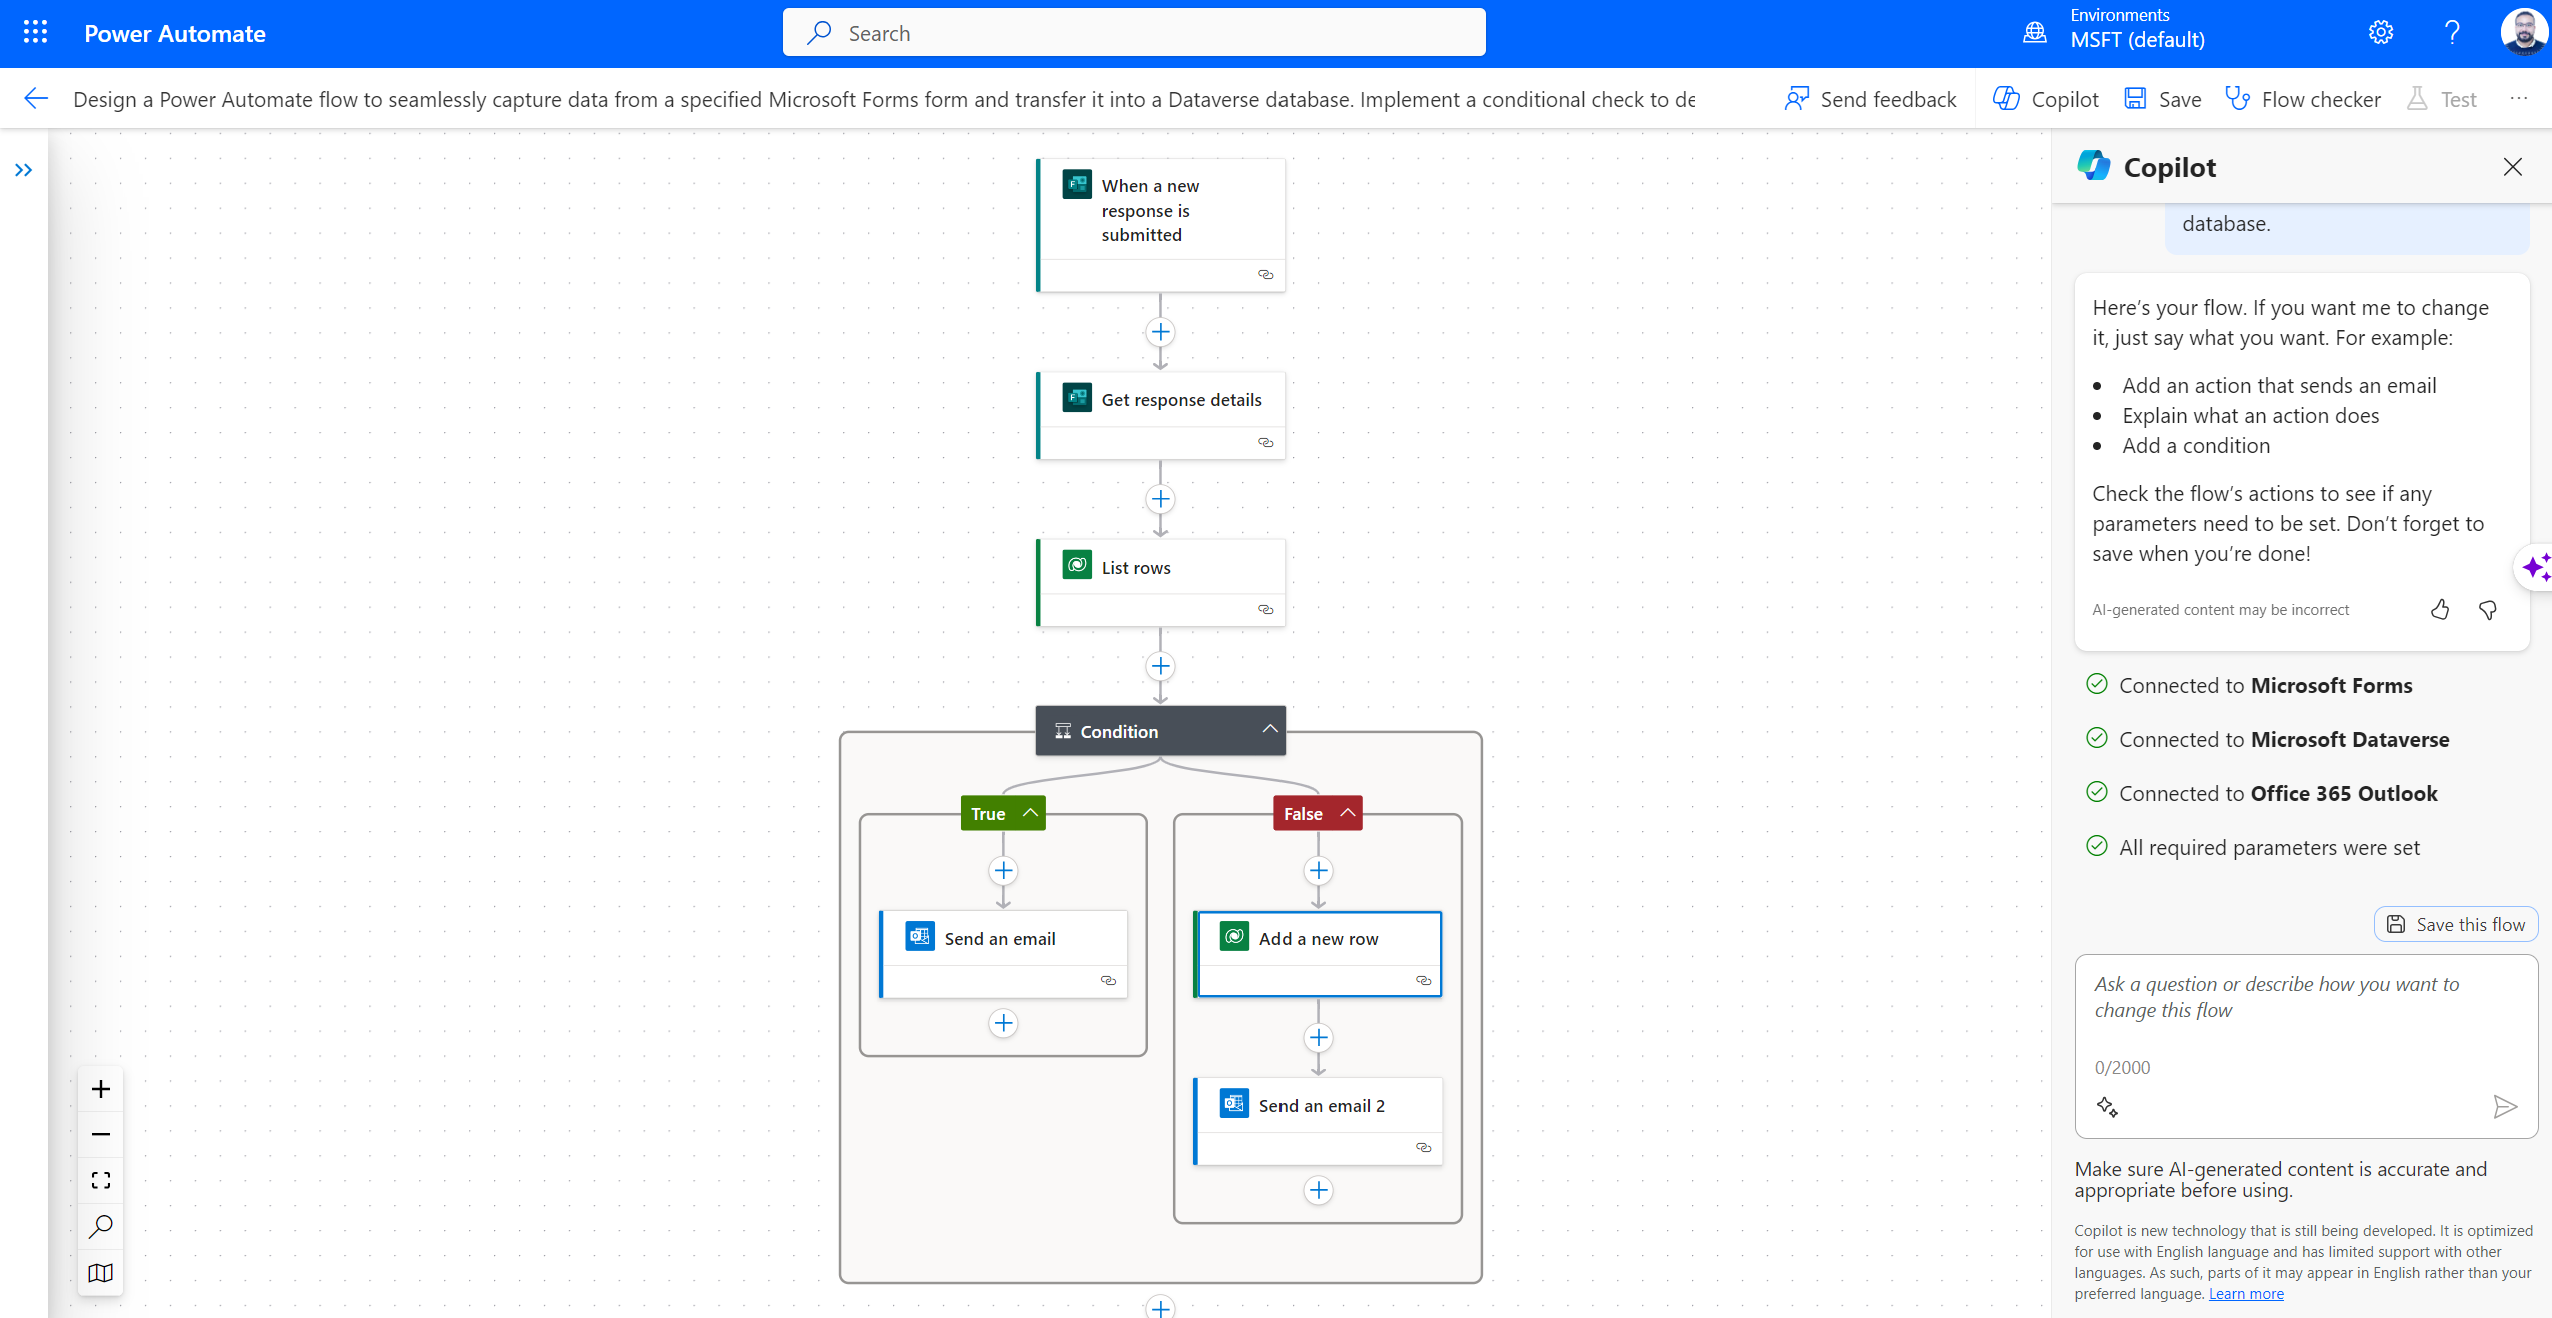
In the following example, we'll build an automated cloud flow to seamlessly capture data from a specified Microsoft Form and transfer it into a Dataverse database. Then determine if the user has previously submitted a form. If so, trigger an email notification to inform the user of the previous submission. Conversely, if it's a new form submission, send an email confirmation notifying the user that the process has been successfully completed and their data is now recorded in the database.
- Sign in to Power Automate
- On the left pane, select Create > Describe it to design it.
A screen opens where you can enter a description of what you want to automate. You'll also get an example you can use for inspiration and try it out right away. As an alternate, you can also go to Home and start describing your requirements.
- For this example, enter "Build an automated cloud flow to seamlessly capture data from a specified Microsoft Form and transfer it into a Dataverse database. Then determine if the user has previously submitted a form. If so, trigger an email notification to inform the user of the previous submission. Conversely, if it's a new form submission, send an email confirmation notifying the user that the process has been successfully completed and their data is now recorded in the database".
Select Confirm (the right arrow).
- Power Automate returns a suggested flow that corresponds to what you've entered.
- Set up all the connections needed to run the flow.
Enter the information needed to run the flow. For example, which form to use and to whom to send the Teams message and email. You can decide to fill in the information on this step or do it later in the designer
Select Create flow.
- And there you have it! Your flow has been built. Congratulations! You can decide to make any modification and edit the flow, or save and test it.
Ensure that the Flow checker is free from errors, indicating that your flow is now prepared for saving and testing.
- If you wish to include an additional action in the flow, leverage Copilot to articulate the desired action, and it will generate it for you. In the given instance, I attempted to add an action with the description "I require an automated notification on Teams containing the Form details after the action 'Send an email 2' only."
- Upon selecting the submit button, the action was automatically generated.
- Ensure the use of valid parameters based on your Microsoft Teams details.
Upon finalizing the entire flow configuration, it is imperative to save and test the flow to ensure its proper functionality.
Proceed by submitting a Microsoft form to validate the seamless operation of your flow.
Proceed by submitting a Microsoft form to validate the seamless operation of your flow.
Limitations:
- Power Automate supports descriptions written in the English language only. Descriptions you write in other languages might work, but they are not supported.
- In the current version, the AI might not fill in some parameters automatically, even if you provide them in the description.


Comments
Post a Comment